You have an old pair of jeans perfect for upcycling into shorts. But you're worried you'll cut them wrong, creating a messy, homemade disaster instead of a stylish frayed look.
To make frayed jean shorts1, start by cutting your jeans to your desired length, leaving an extra inch for the fray. Then, simply put them through a standard wash and dry cycle. The machine's agitation2 will naturally unravel the raw edge into a perfect fray.
Creating distressed and frayed finishes is something we do every day at my factory, DiZNEW. While we use industrial sanders, lasers, and huge washing machine3s to get the look just right for designers like Dean, the basic principle is the same: breaking down the cotton fibers.
The great news is you can get a fantastic, authentic-looking result at home with just a few basic tools. It's all about controlling the process to achieve the exact level of distressing you want, from a subtle fray to a completely worn-in look.
How to turn jeans into jean shorts?
You're ready to make the cut, but you're not sure where to start. You know that one wrong snip can make them too short, ruining your favorite jeans for good.
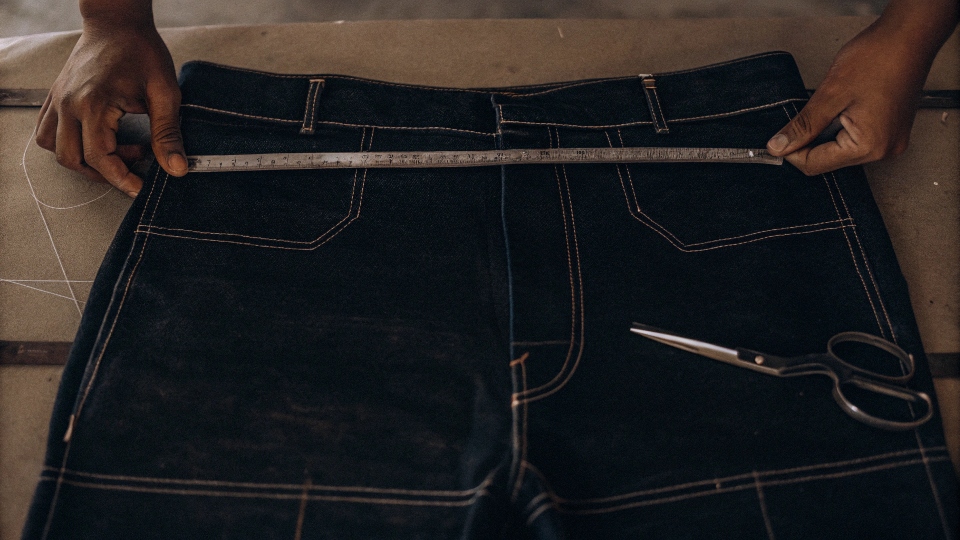
To turn jeans into shorts, put them on and mark your ideal length with chalk—then add an extra inch. Take them off, lay them flat, use a ruler to draw a straight line between your marks, and cut carefully with sharp fabric scissors4.
This initial cut is the most important step, and precision is key. Trying on the jeans to mark them is crucial because denim sits differently on your body than it does lying flat. The extra inch you add is your "fray allowance5."
The washing process and the fraying itself will make the shorts appear slightly shorter, so this buffer is essential. For a more flattering, professional look, consider cutting a slight upward angle on the outer seam, making the inseam a little longer than the outside edge.
This creates a subtle "V" shape that elongates the leg. Always use sharp fabric scissors4, not kitchen scissors. A clean cut allows the threads to unravel evenly, which is the foundation for a great-looking fray.
DIY Cut-Off Checklist
| Step | Action | Why It's Important |
|---|---|---|
| 1. Wear & Mark | Put on the jeans and mark the length with chalk. | Ensures the length is correct for your body shape. |
| 2. Add Buffer | Add an extra inch or two to your desired length. | Accounts for shortening from fraying and washing. |
| 3. Lay & Draw | Lay the shorts flat and draw a straight cutting line. | Creates a clean, even edge for a professional result. |
| 4. Cut Carefully | Use sharp fabric scissors to cut along the line. | Prevents jagged edges and ensures even fraying. |
How to make denim look frayed?
You've cut your shorts, but the bottom edge is just a clean, sharp line. It looks exactly like what it is—a DIY project—not the effortlessly cool, naturally worn-in style you wanted.
The easiest and most effective way to make denim look frayed is to use your washing machine. The combination of water, detergent, and the tumbling agitation will perfectly break down the raw edge, creating a soft, authentic fray.
This is the secret to getting a natural-looking result. In denim fabric, you have vertical blue threads (the warp) and horizontal white threads (the weft). When you cut the fabric, you sever the warp threads.
The agitation of the washing machine then physically knocks the loose ends of those white weft threads out of the weave, creating the classic white, fluffy fray.
For an even more intense effect, wash the shorts on a heavy-duty cycle with a few old towels. The extra friction from the heavy towels rubbing against the raw edge will speed up the process and create a thicker, more prominent fray.
Follow it up with a cycle in the dryer; the heat helps to soften the fibers and set the frayed look.
How to make a frayed hole in jeans?
You want to add some character with cool, threadbare holes. However, you're worried about accidentally cutting a gaping, ugly square that looks fake and will just rip wider with every wear.
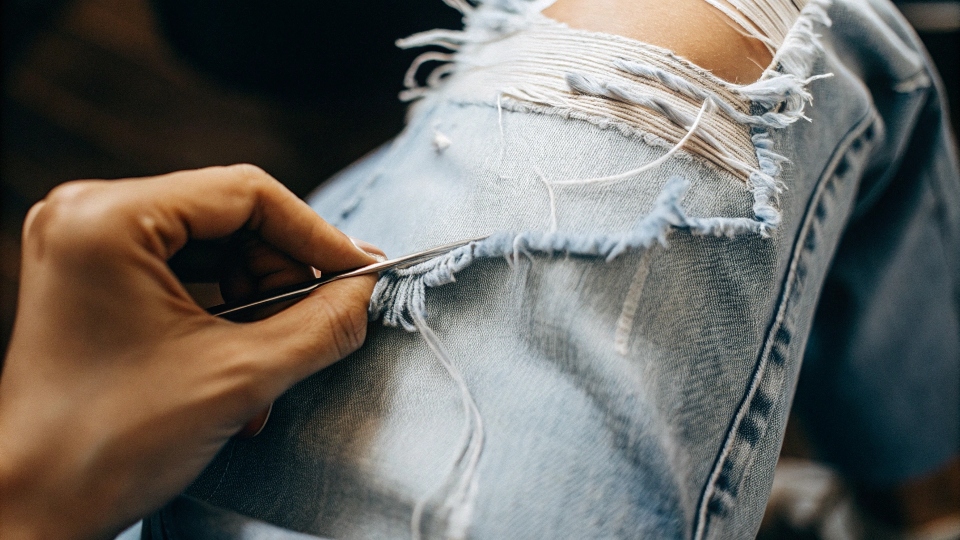
To create a realistic frayed hole, first weaken an area with sandpaper. Then, make two parallel horizontal cuts. Finally, use tweezers to meticulously pull out the vertical blue threads (warp), leaving the horizontal white threads (weft) exposed.
This technique perfectly mimics how jeans wear out naturally over time. The key is understanding the fabric's construction. The blue warp threads run vertically and are typically what break first from wear and tear, exposing the white weft threads that run horizontally.
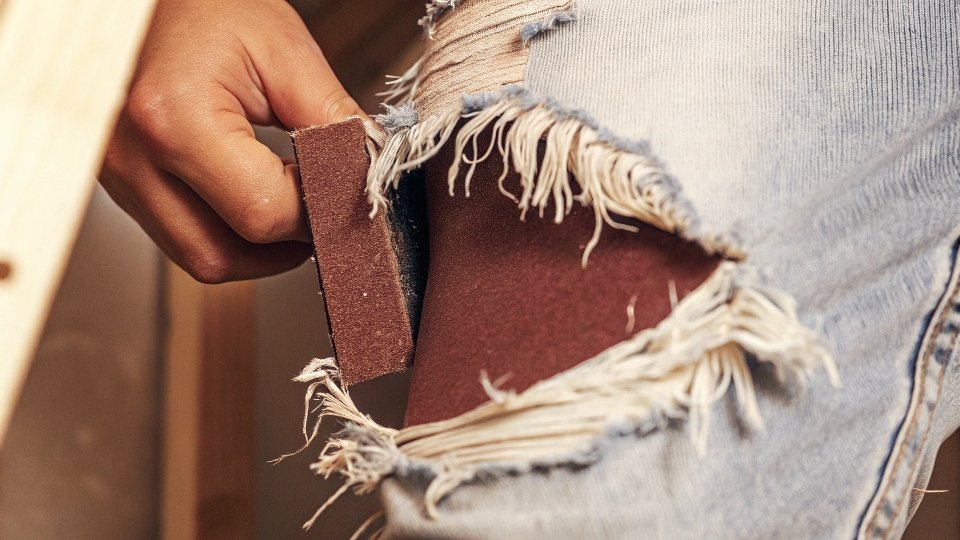
Your goal is to recreate this process manually. Start by rubbing your target area with sandpaper or a pumice stone to thin out the fabric. Then, use a craft knife or small scissors to make two horizontal cuts, about half an inch apart.
It's vital these cuts are horizontal, following the direction of the white threads. Now for the detailed part: use a pair of tweezers to carefully pull out all the blue, vertical threads between your two cuts.
Be patient. As you remove them, the white horizontal threads will be left behind, giving you that perfect, store-bought distressed look.
How to fray jeans without washing?
You don't have access to a washing machine, or you're in a hurry and can't wait for a full wash cycle. You're stuck with a sharp, clean-cut edge and need a way to get that soft frayed finish manually.
To fray jeans without washing, you can use simple tools to agitate the raw edge. Vigorously rub the cut edge with sandpaper, a pumice stone, or a wire brush. You can also use tweezers or a seam ripper to pull out individual threads.
These manual methods give you a lot of control over the final look, though they require a bit more effort. Each tool provides a slightly different finish.
Using Abrasives
Sandpaper (medium grit), a pumice stone, or even the rough edge of a brick works well. Lay the hem of your shorts flat and rub the abrasive tool back and forth along the raw edge. This will rapidly break down the fibers and start the fraying process. The harder you rub, the more distressed the edge will become.
Using Precision Tools
For a more delicate or specific look, you can use a pair of tweezers, a seam ripper, or even the tines of a fork. Use the tool to pick and pull at the horizontal white threads along the cut edge, drawing them out one by one.
This is a slower process, but it's perfect for creating a softer, more subtle fringe rather than a thick, fluffy fray. This method gives you ultimate control over the length and density of the frayed threads.
Conclusion
Creating your perfect frayed shorts is simple. Cut your old jeans to the right length, then let a wash cycle do the work for you to create a natural frayed edge.
-
Explore expert tips to achieve the perfect frayed look for your DIY jean shorts. ↩
-
Discover the science behind how agitation helps create the perfect frayed edge. ↩
-
Learn how the washing machine can help you achieve a natural frayed look. ↩
-
Find out why using the right scissors is crucial for a clean cut and fraying. ↩ ↩
-
Understand the importance of fray allowance to avoid cutting your jeans too short. ↩


